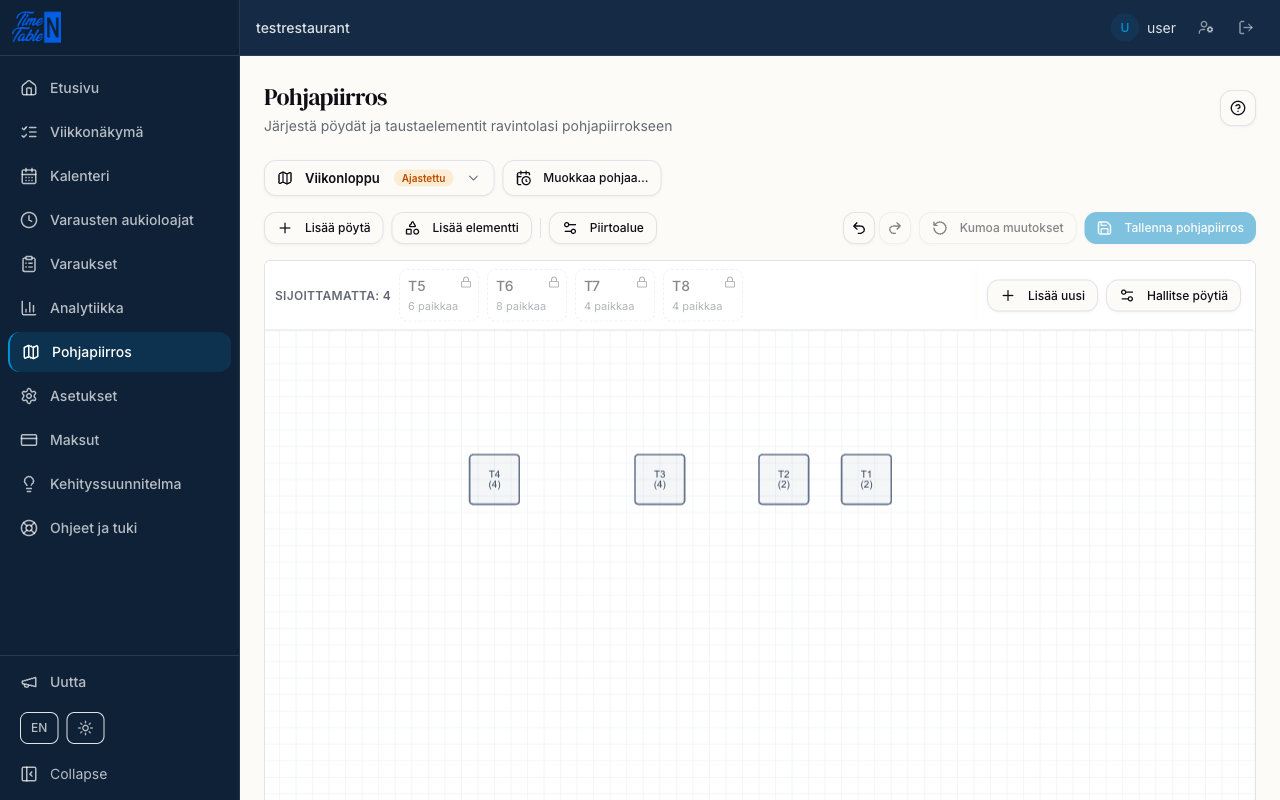
Layouts & schedules
A restaurant can have more than one layout — for example a main room, a terrace and a private cabinet — each with its own table arrangement, schedule and online-booking rules. This page explains what layouts are and how their schedules and online booking work, through three practical examples.
What layouts are
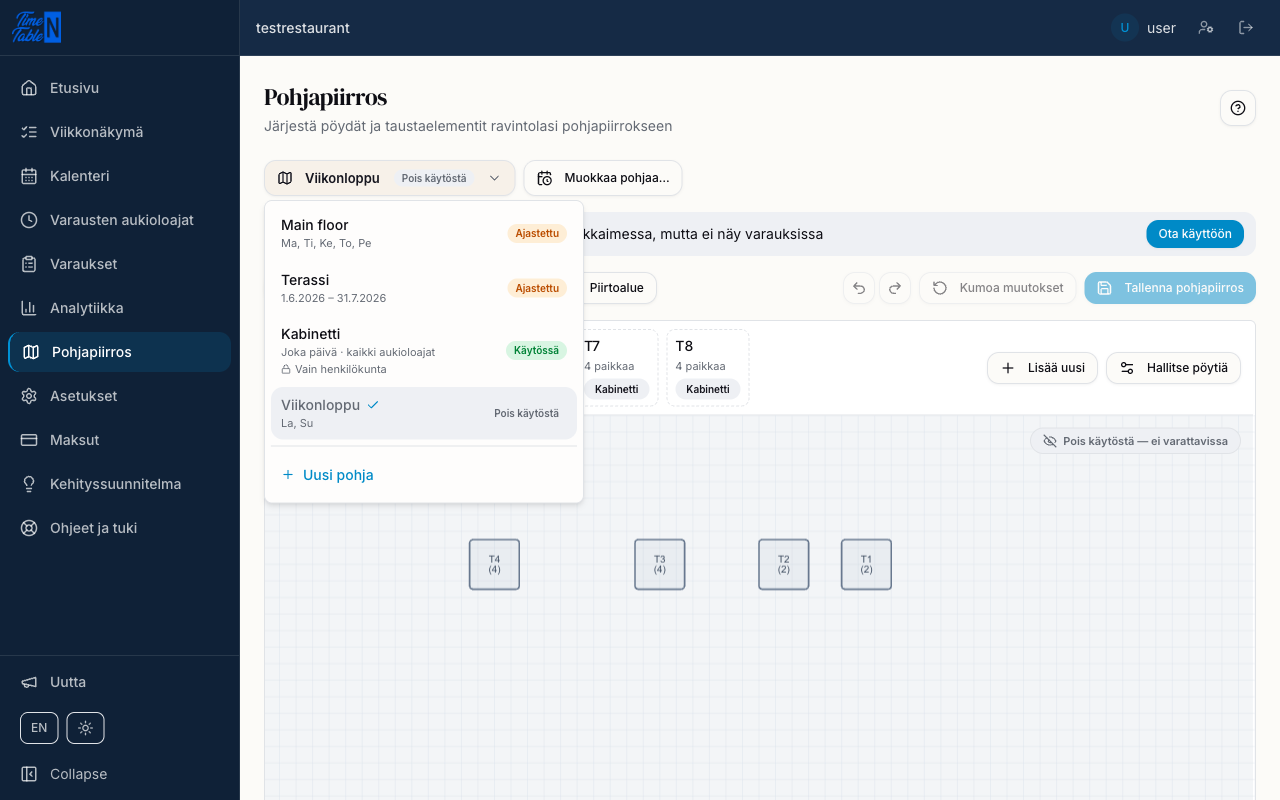
Each layout is its own table arrangement for some area or arrangement: a terrace for the summer season, a cabinet for private events, or even a different arrangement of the same room on weekends. A layout's state shows as a colored badge in the layout switcher:
- Active (green) — the layout is switched on and has no time constraints at all: it is in effect whenever the restaurant is open.
- Scheduled (amber) — the layout has a season, specific weekdays and/or hours set under Time constraints. This badge appears as soon as any constraint is set — including while that constraint currently happens to be in effect — so it doesn't by itself tell you whether the layout is taking bookings right now. The calendar's Floor mode and the Timeline's Layouts shown filter show whether the layout applies on the selected day, but neither takes the time of day into account — a layout open only 17:00–23:00 still shows as active there first thing in the morning.
- Inactive (gray) — the layout has been switched off by hand. It stays in the editor for editing, but its tables don't appear in any booking.
Time constraints
Every layout's Edit layout… dialog has a Time constraints section where you set when the layout is in effect:
- Season (From/Until) — e.g. a terrace only from June 1 to August 31.
- Days — which weekdays the layout is in effect.
- Hours — which hours of the day the layout is in effect.
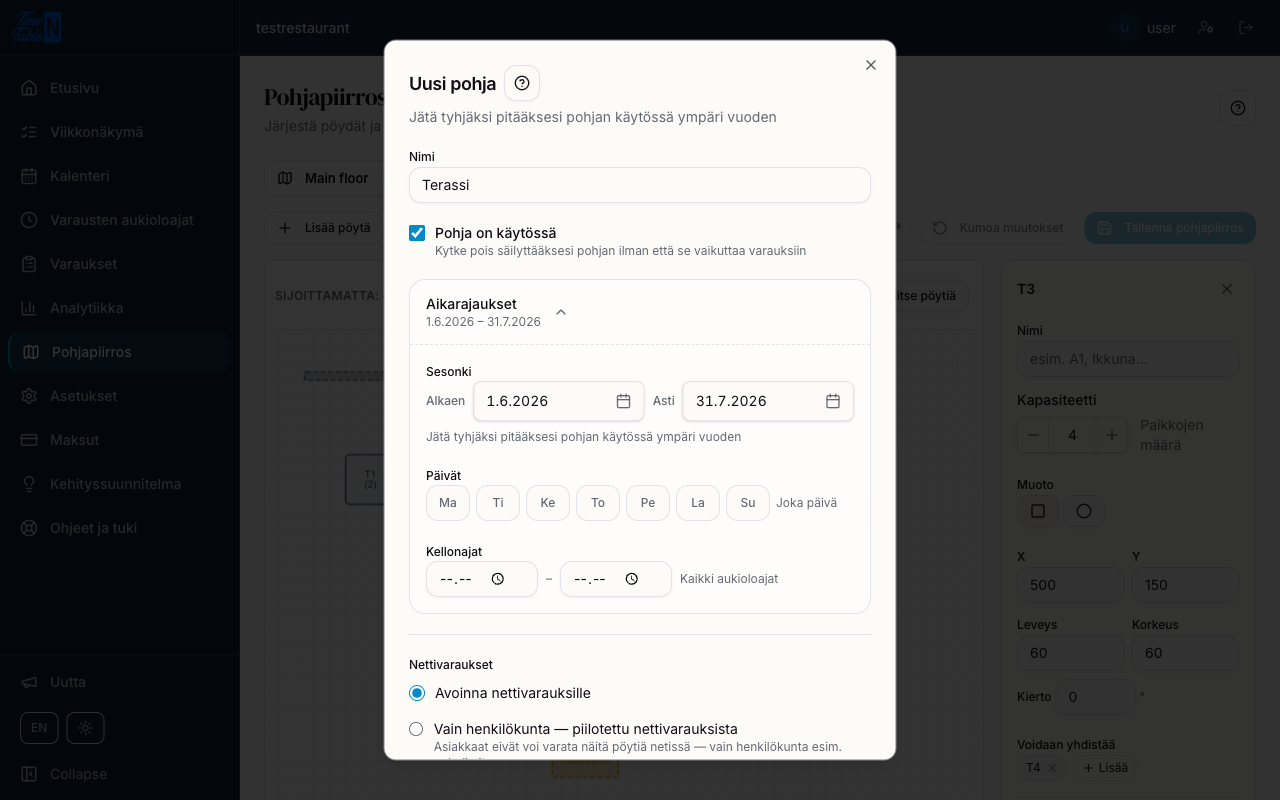
Leaving a field empty means "always, whenever the restaurant is open" — a layout doesn't have to be tied to any season or day. A seasonal layout like a terrace automatically stops taking bookings once its season ends — you don't need to remember to switch it off yourself.
Online booking
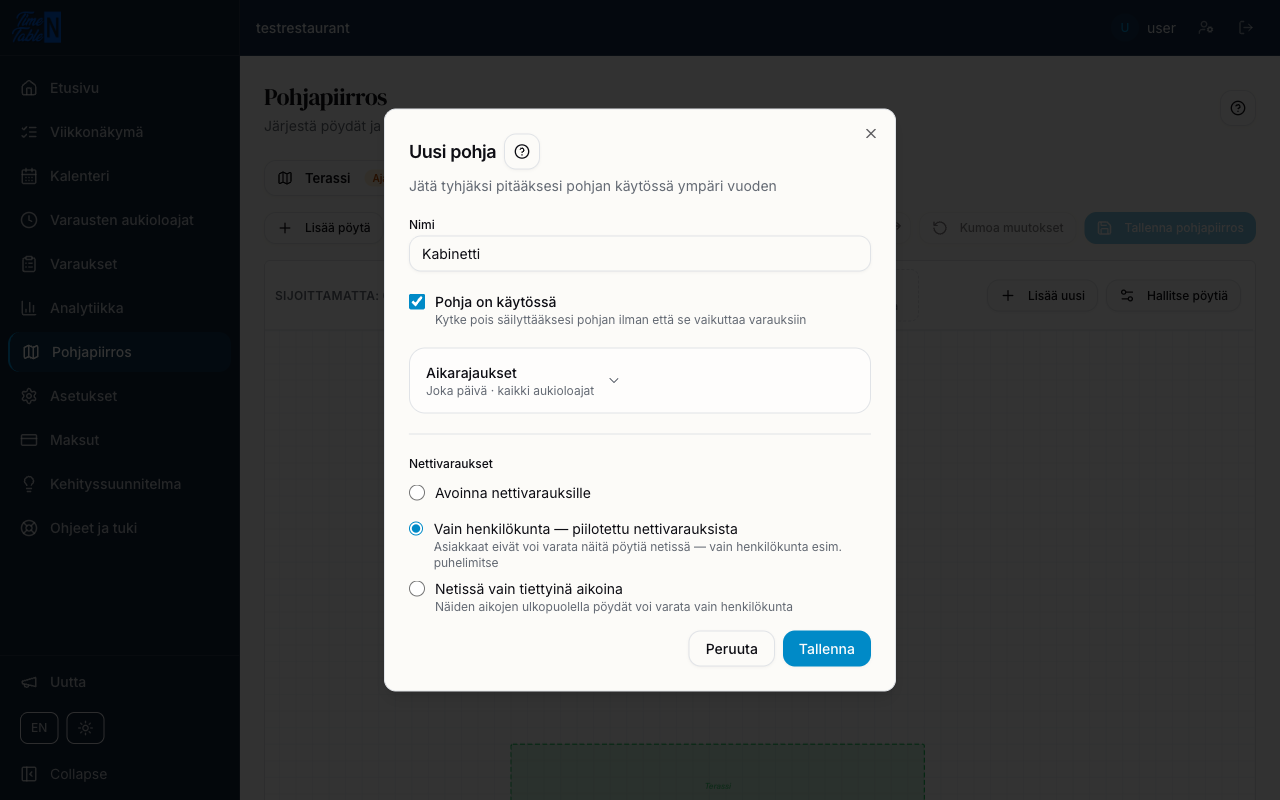
The same dialog decides how a layout's tables can be booked online (the Online booking section):
- Open for online booking — the default: customers can book the tables directly online.
- Staff only — hidden from online booking — the tables never appear on the customer booking page; only staff can book them, e.g. by phone.
- Online only at certain times — the tables are bookable online only inside the time windows you define; outside those windows only staff can book them.
When several layouts are open for online booking at the same time, the Fill order for online bookings setting decides which layout's tables are offered first: the layout with the lower number fills first (1 = filled first). Use this to make sure, for example, your main room fills up before online bookers are offered overflow space.
A table on no layout at all
There's one more state outside these channel settings: a table that isn't placed on any layout (see Floor plan & tables). Such a table is never shown online, regardless of what channel setting any other layout uses — it's always staff-bookable only, until you place it on a layout that's open for online booking.
This holds no matter how many tables you have placed. Emptying every layout, or deleting the last layout that still had tables on it, simply leaves all of those tables unplaced — and therefore staff-bookable only. Your online booking page will show no times at all until at least one table sits on a layout that is open for online booking.
One active layout per table
The same table can be on more than one layout — but only if their schedules never overlap. A typical example is the same room's lunch and dinner arrangements on different weekdays. If you try to place or activate a table so that it would end up in two layouts active at the same time, the editor blocks the action and names the layout causing the conflict.
Deleting a layout and changing its schedule
A few rules protect existing reservations when you delete a layout or change its schedule:
- The last layout can't be deleted. A restaurant always needs at least one layout.
- A layout can't be deleted or switched off while a table on it has a current or upcoming reservation that no other active layout covers. Move the tables to another layout, or move the reservations, first.
- Shrinking a schedule — for example shortening a season, or narrowing the days or hours — asks for confirmation if the change would leave existing reservations outside the new schedule. You can still save it: those bookings stay valid, but the tables won't be bookable at those times through this layout anymore.
Tutorial 1: Summer terrace
Let's create a layout that's only in effect during the summer months.
- Open Floor plan and open the Layouts switcher.
- Choose New layout.
- Name it "Terrace".
- Open Time constraints and set the Season: From June 1, Until August 31.
- Leave Online booking at its default, Open for online booking.
- Click Save.
- Add the terrace's tables to the canvas with the toolbar's Add table button, or drag existing tables down from the Unplaced tray.
- Click Save Layout.
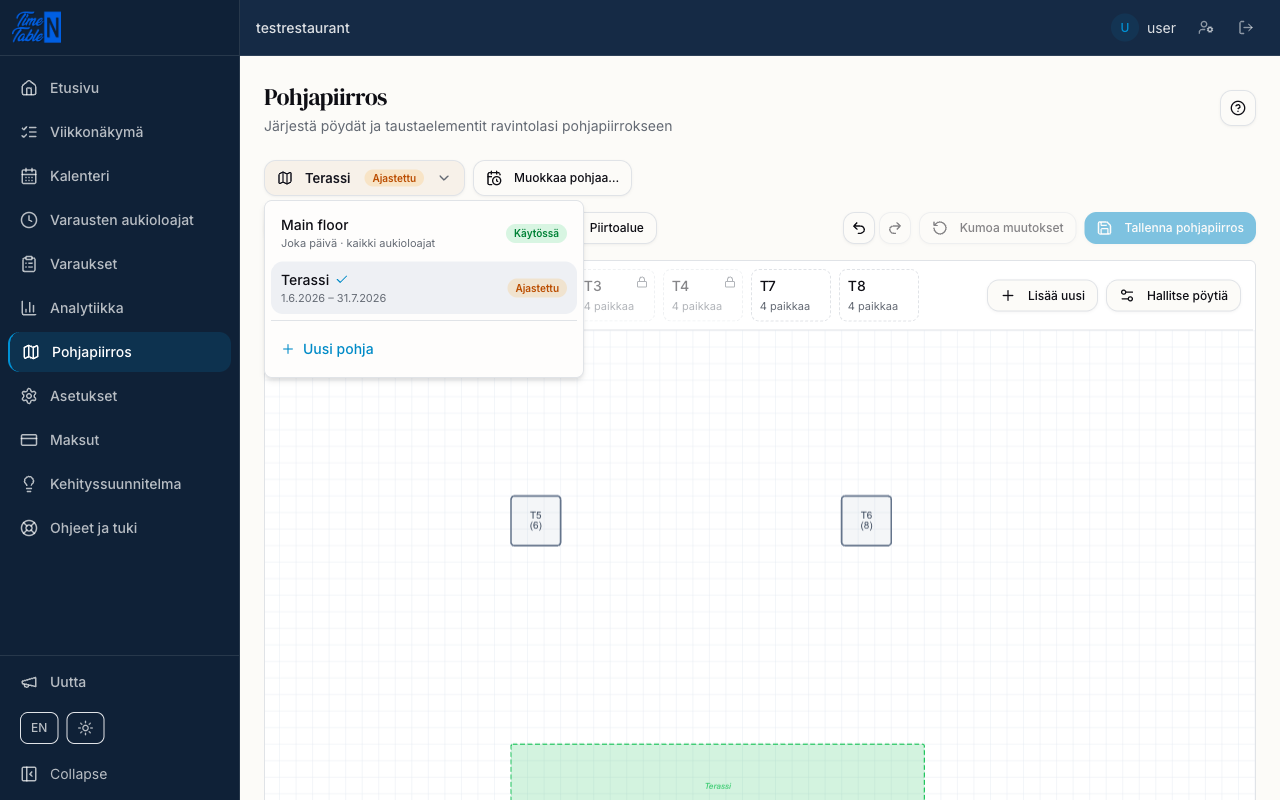
Because Terrace now has a season set, the switcher shows it as Scheduled at all times — including in the middle of summer. Actual booking still follows the season closely, though: once August 31 passes, the terrace's tables stop taking bookings until next summer starts, with nothing further for you to do.
Tutorial 2: Staff-only cabinet
Let's create a private space that only staff can book.
- Layouts → New layout.
- Name it "Cabinet".
- Online booking → choose Staff only — hidden from online booking.
- Click Save.
- Place the cabinet's tables on the canvas.
- Click Save Layout.
Customers never see these tables on the booking page — staff book them normally through the calendar (New walk-in or a regular new reservation). The layout switcher shows a padlock icon on the Cabinet row as a reminder that it isn't freely open for online booking — the same icon also appears on Online only at certain times layouts, which do still take online bookings during their own windows.
Tip
If you'd rather offer lunch online but keep dinner phone-only, use Online only at certain times instead and set the lunch hours as a time window.
Tutorial 3: Weekend main floor
The same room can look different on weekdays and weekends — without needing duplicate tables.
- Open the main layout and choose Edit layout….
- Open Time constraints and set Days: Mon–Fri.
- Click Save.
- Layouts → New layout, name it "Weekend".
- Set Days: Sat–Sun.
- Click Save.
- Drag the same tables from the Unplaced tray into a new arrangement on the Weekend layout.
- Click Save Layout.
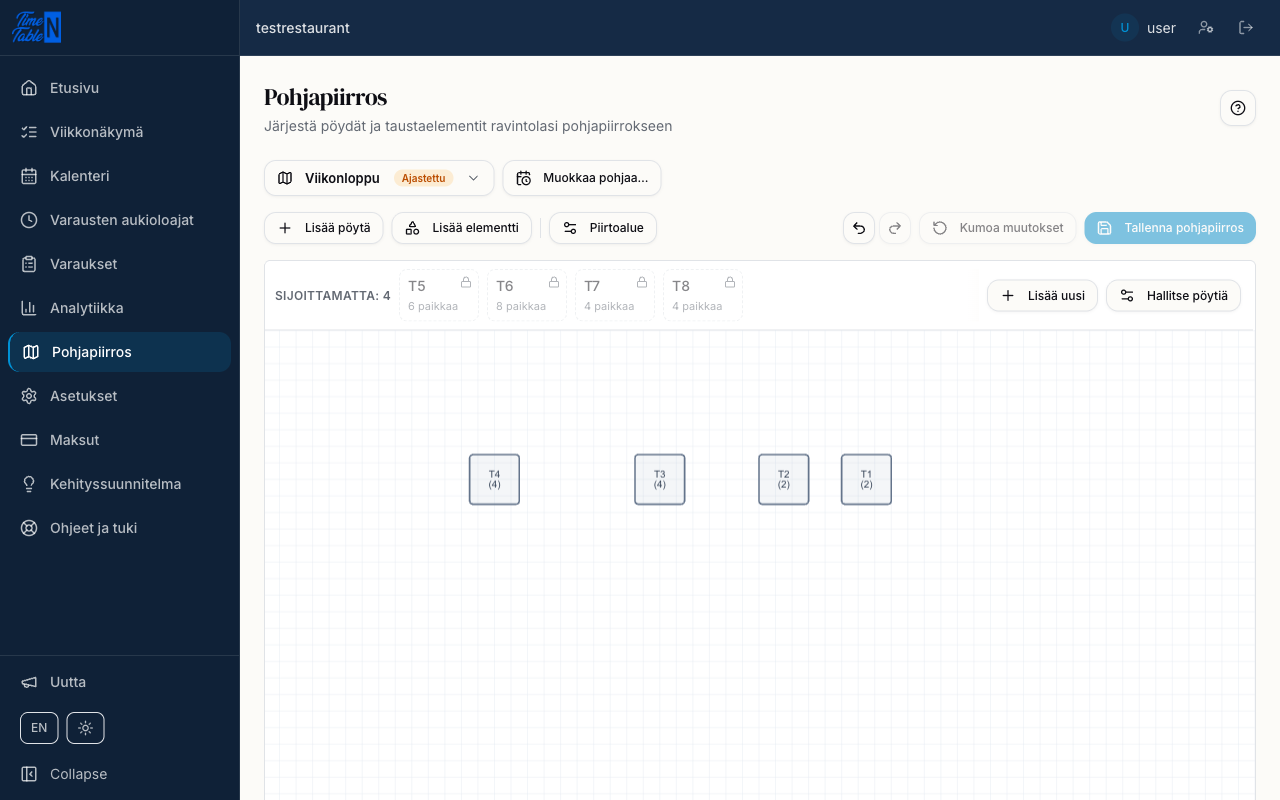
This works because the main layout is only in effect Mon–Fri and the Weekend layout only Sat–Sun — their schedules never overlap, so the same table can belong to both. If the schedules did overlap (for example, if you forgot to restrict the main layout to weekdays), the editor would block the placement and show an error naming the other layout: