Floor plan & tables
In the Floor plan view you place tables on the map, edit their settings, and manage your whole table roster. It's a single editor now — no more separate tabs. If your restaurant has more than one layout (for example a main room, a terrace and a private cabinet), see Layouts & schedules for how those work.
Editor
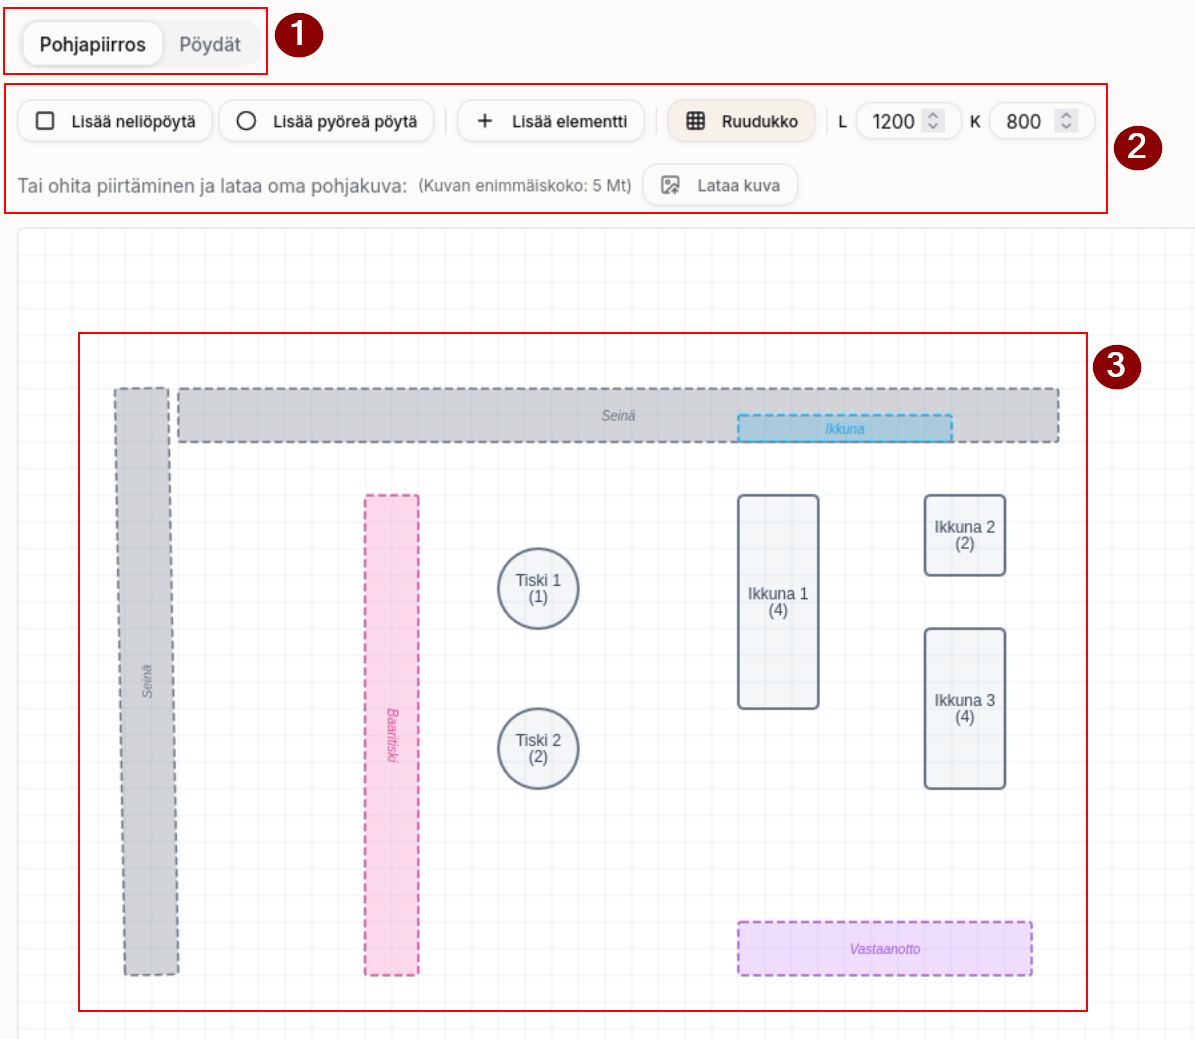
- Layout switcher — shows which layout is currently open and opens the list of all layouts. The Edit layout… button next to it opens the selected layout's schedule and online-booking settings.
- Toolbar — Add table (square or round), Add element (walls, windows, a bar counter and so on — for reference only) and Canvas, which holds the grid toggle (Grid), the canvas's W and H size, and uploading your own background image. On the right are Undo/Redo, Reset Changes and finally Save Layout — you must click this for your changes to be saved.
- Unplaced tray — tables that aren't on this layout. See below for details.
- Canvas — drag tables and elements into place. Select an item and use the corner handles to resize or rotate it. Items snap to the grid for easy alignment.
- Table properties panel — opens when you select a table on the canvas. See Editing a table.
The editor also works on touch devices: pinch to zoom, and long-press a table or element to open a quick-action menu (duplicate, delete, etc.).
Unplaced tray
Tables that aren't in use on the current layout wait above the canvas in the Unplaced tray. Drag a table down onto the canvas to place it, or tap it — it lands in the middle of the canvas.
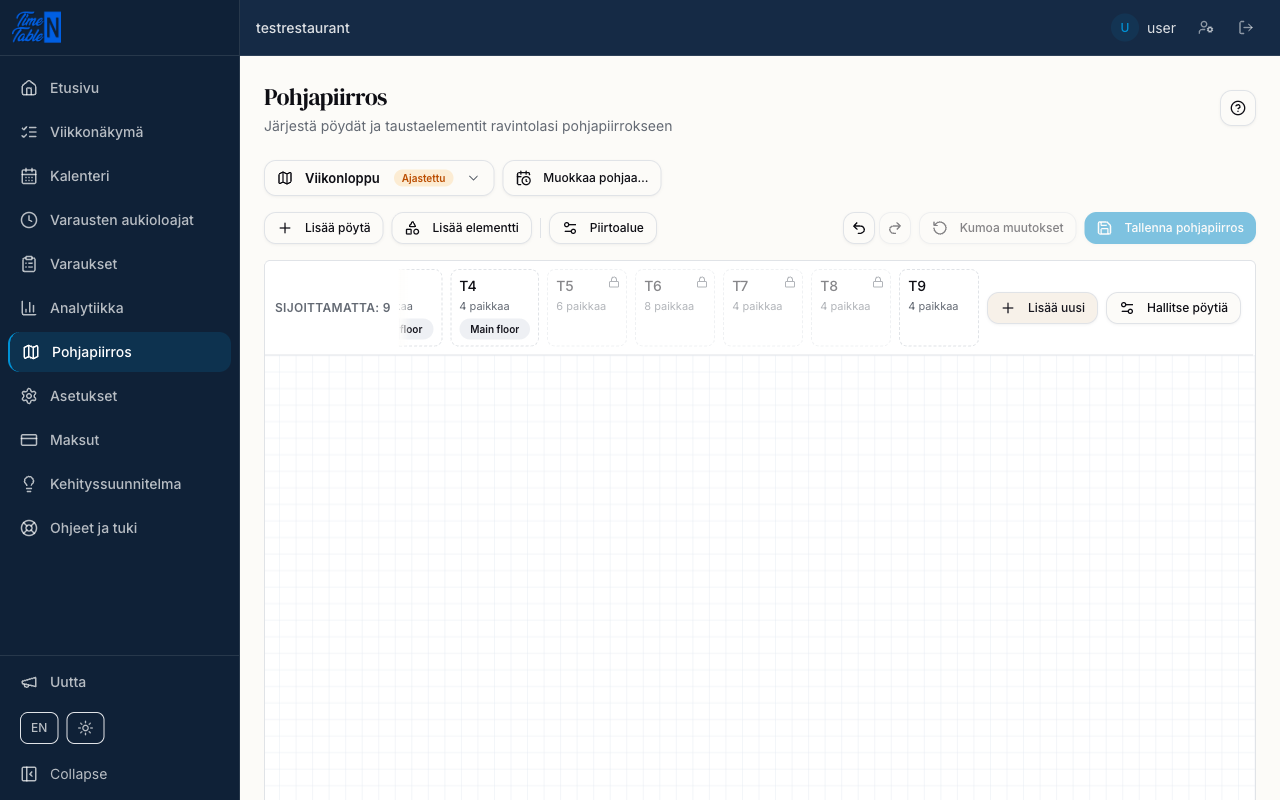
The tray's chips show a table's state:
- Plain — the table isn't on any layout yet, free to place.
- On another layout — the chip names the layout the table is already on (e.g. "On "Cabinet""); with more than one, a "+N more" note follows.
- Locked (padlock icon) — the table is already placed on a layout whose schedule overlaps the current one, so it can't be placed here until the schedules stop overlapping. Tap a locked chip to see which layout is the reason.
An unplaced table is still bookable
A table left unplaced isn't out of service: staff can book it normally. It is just never offered to customers online, because it isn't on any layout whose online-booking settings could decide when it should appear on the customer booking page. Place it on a layout and open that layout's Online booking section to make it appear there — see Layouts & schedules.
Editing a table
Selecting a table on the canvas opens the properties panel to the right (or below the canvas on narrow screens):
- Name and seat count.
- Shape — square or round.
- Position (X/Y), Width, Height and Rotation as numbers.
- Can combine with — which other tables can be combined with this one. See Combining tables.
- Duplicate — creates a copy of the table named "(copy)".
- Remove from this layout — the table goes back to the Unplaced tray on this layout, but stays on any other layouts and in the table roster.
- Delete table… — retires the table everywhere (every layout and every combination). Always asks for confirmation. What happens next depends on the table's history — see Deleting and archiving.
Manage tables
The Manage tables button (on the right of the Unplaced tray) opens a card grid listing every table in your restaurant, no matter which layout it's on.
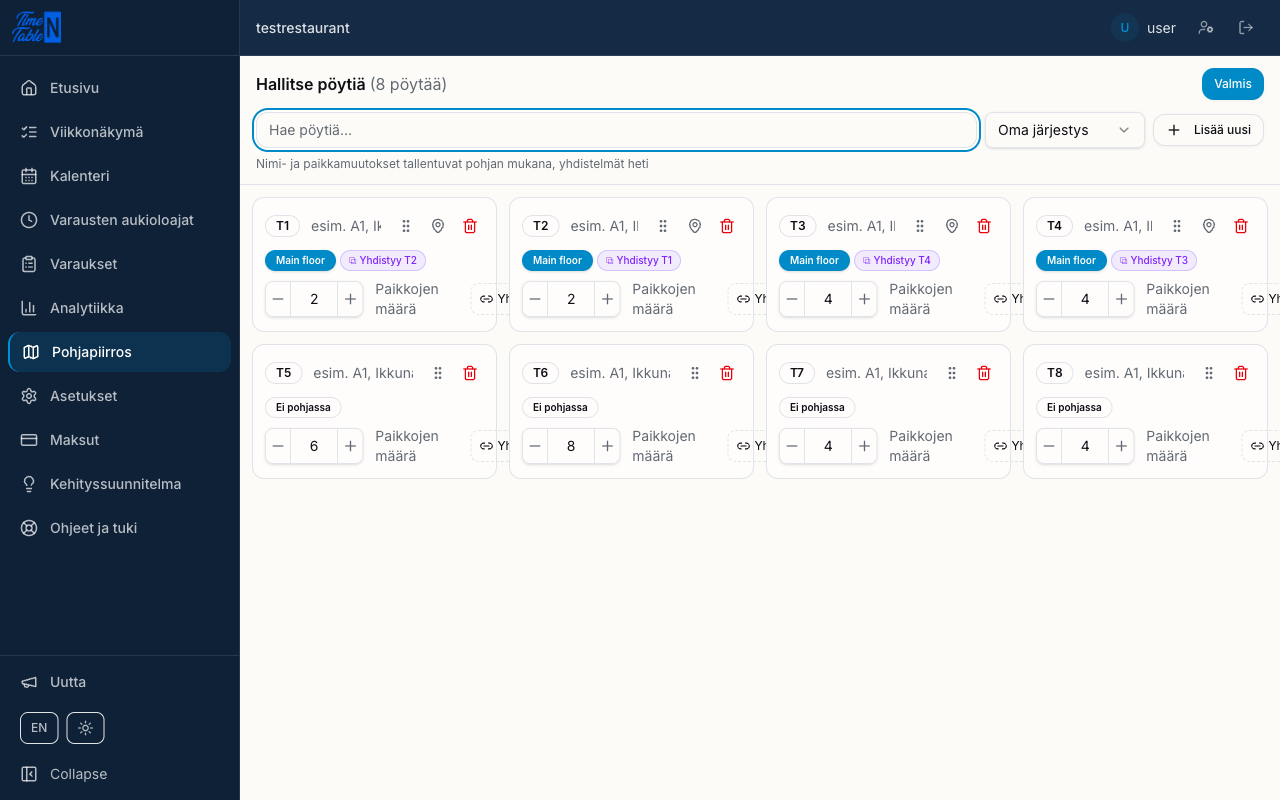
From here you can:
- Rename tables and change seat counts — these save with the layout.
- Reorder tables with the Sort menu next to the search box: custom order (drag the handle to reorder), table number, name or seat count.
- See which layouts each table is on, as tags under the card.
- Start linking tables with the Link button — see the next section.
- Delete a table — see Deleting and archiving.
- Restore a previously archived table from the Archived section at the bottom of the list.
A table added here but not yet placed on any layout is immediately bookable by staff, but won't show up on the customer booking page until you place it on a layout — see the tip under the Unplaced tray above.
Tip
The custom table order affects the order tables appear in as calendar columns and on staff lists.
Deleting and archiving
A table can't simply vanish if reservations were made on it — those bookings would lose the record of where the guests sat. So deleting a table does one of three things, decided automatically:
- Nothing has ever been booked on it → the table is deleted for good.
- It only has past or cancelled reservations → the table is archived: it disappears from your layouts, the Unplaced tray, the table list and every booking view, but those old reservations still show it as the table they were on. It is removed permanently once nothing references it any more — which, until automatic reservation clean-up ships, means once those reservations are deleted.
- It has a confirmed reservation that hasn't ended yet → deletion is refused. Move or cancel that reservation first.
Getting a table back
Right after deleting, Ctrl+Z (Cmd+Z) undoes it — an archived table comes back exactly as it was, keeping its history.
Once you've saved the floor plan, use the Archived section at the bottom of Manage tables instead. A restored table comes back on no layout, so place it on one to make it bookable online again.
Table numbers aren't reused while any reservation still points at them. If you delete table 3 and add a new table, the new one gets the next free number, not 3 — reusing it would silently relabel the old reservations that still refer to the original table 3.
Combining tables
Combining (link mode) tells the system which tables can be booked together for a larger group. Start it from a table's Link button, either in Manage tables or in the table's properties panel.
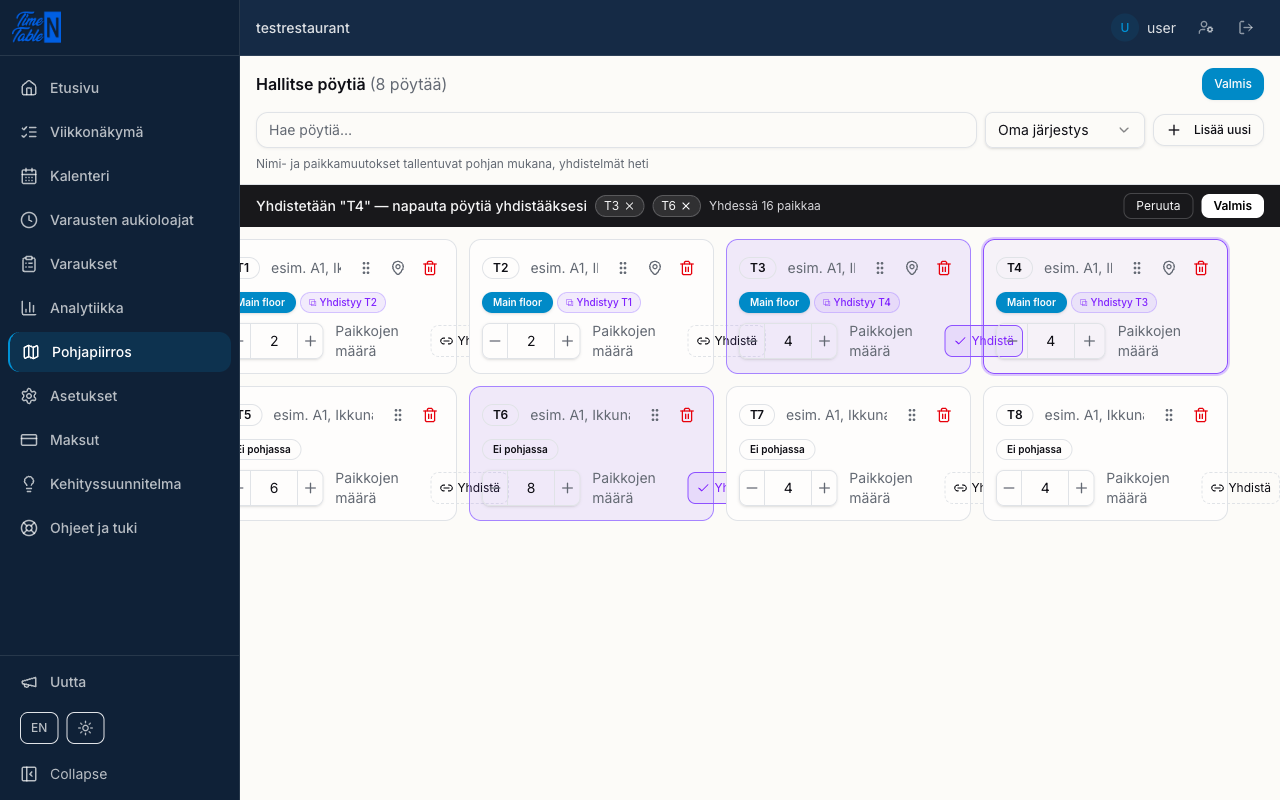
Tap the tables you want to combine with the first one — the selected tables and their combined seat count update live in the bar at the bottom. Click Done to save the combination.
You can combine up to 6 tables into one group. Once a group is saved, the system automatically offers every smaller combination within it too (for example, any pair from a three-table group), so you don't need to create those separately.